 |
 |
| The northwest premiere used dirt bike parts store. Quality vintage, motocross, dual sport and modern used dirt bike parts. Your dirt bike engine and part information source. | |
This page is intended to give you tips on how to replace your 2006 Toyota Tundra Rear brake pads for a drum style brake.
It is not intended to give you step by step instructions but it should give you a real good idea of what you are up against.
We are not certified mechanics and have no special knowledge in the automotive field.
Please use this information at your own risk.
That being said, I went on the internet to search for pictures or video's of how to remove the old brakes and install the new ones for my wife's 2006 Toyota Tundra.
I could not find any helpful information.
Since I did not have the shop manual for the truck I had to wing it :-)
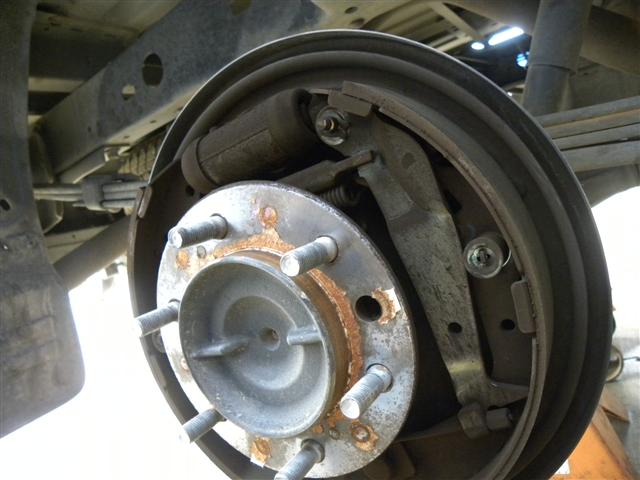
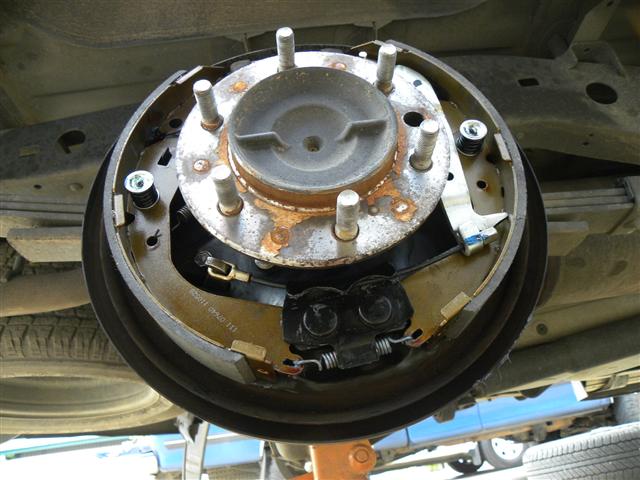
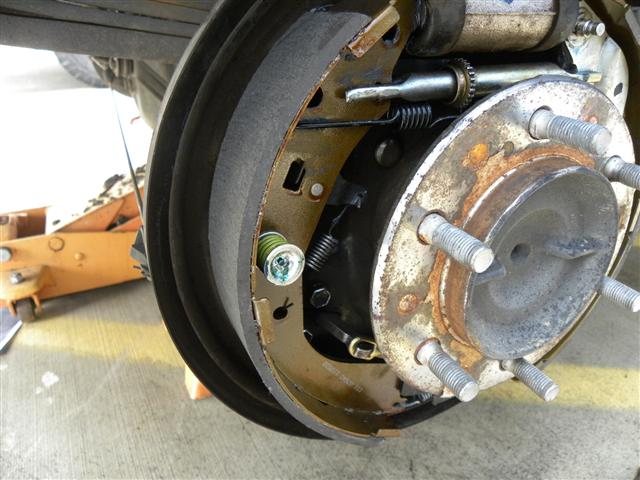
After blocking the front wheels, jacking up the truck, and resting the rear axle housing on some jack stands, I removed the wheel and this is what I found:
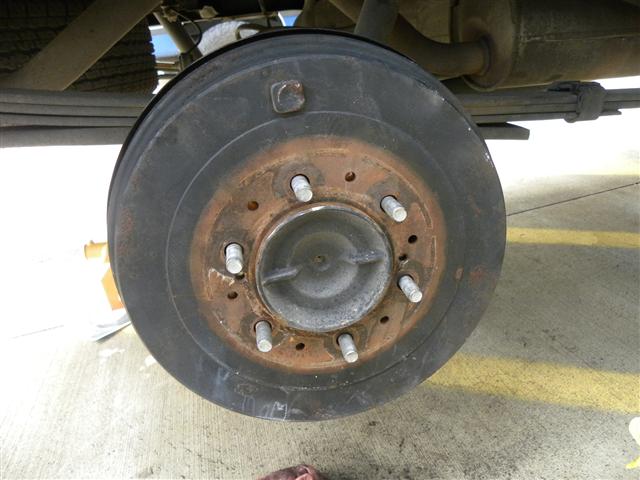
I grabbed the drum and pulled......Then I pulled some more...... Nothing.
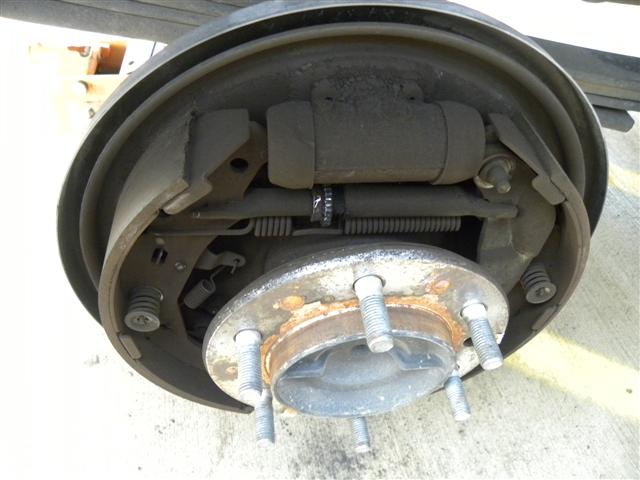
So I looked at the rear backing plate and found the rubber adjustment cover.
I removed the cover and turned the internal adjustment wheel so that the pads were loose.
Then I pulled on the drum..... Nothing..... Next I grabbed a rubber mallet and beat on it for a while...... Still nothing......
Since my eyes aren't the best anymore I should have had my glasses on.
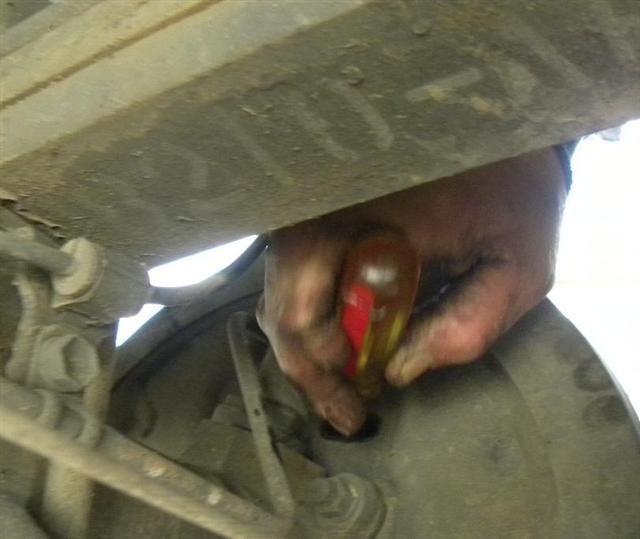
One of my friends says, "Hey, it looks like there are some jack holes".
I had looked but I did not see any threads in any of the holes.
I put my glasses on and.....

That would have saved me a half hour of head scratching.
Then I located some bolts of the correct thread size and pitch and put them evenly in the jack holes.
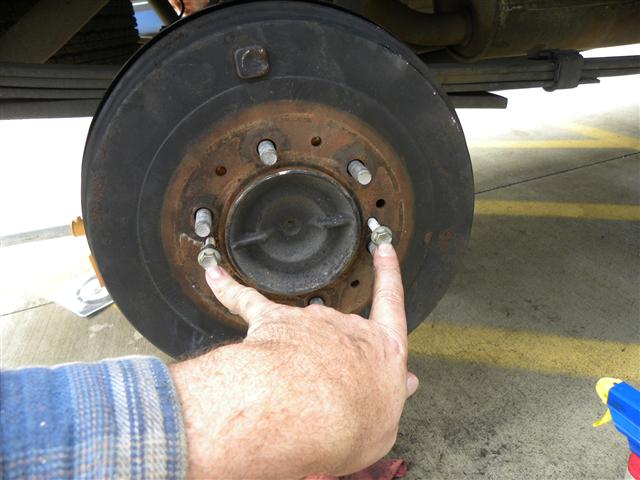
I grabbed a wrench and turned each bolt evenly.
Then....
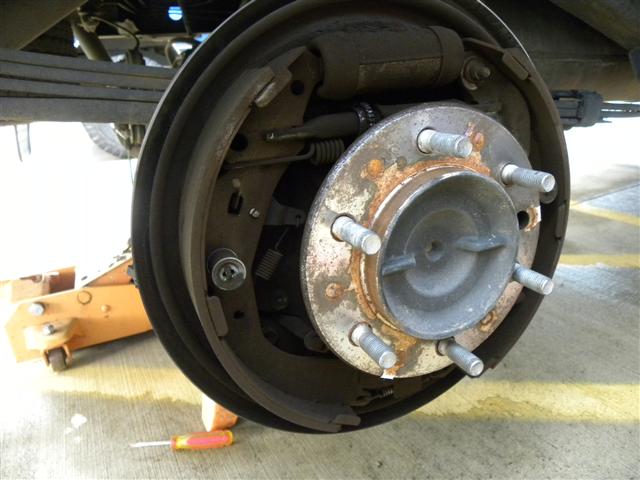
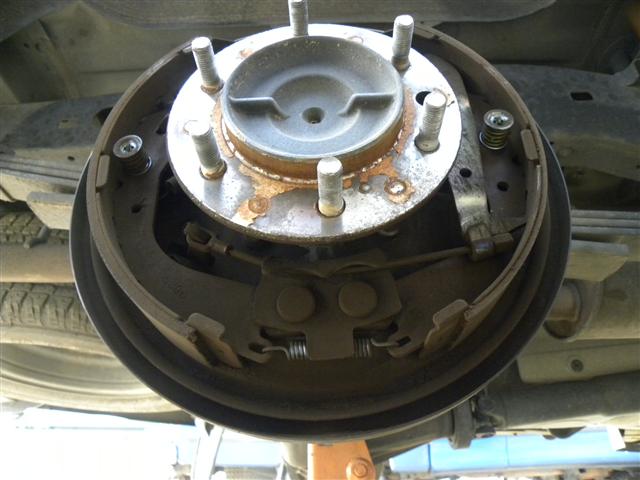
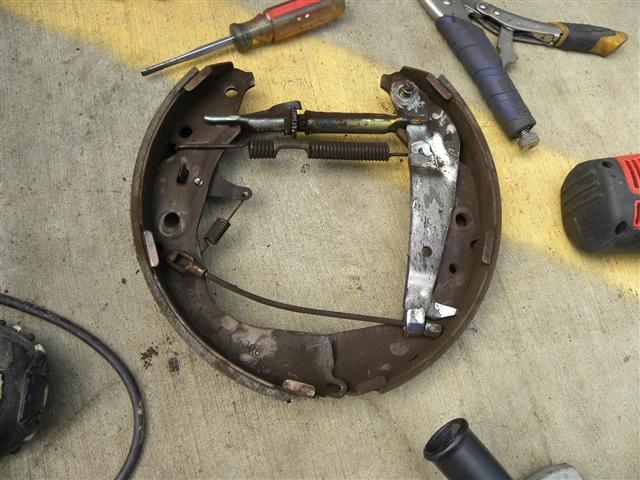
The brake shoes looked ok, but I already had the new shoes so I went ahead and replaced them any way.
At this point, if you have a camera I suggest you get it out and snap a lot of pictures unless you have a great memory.
Now let me see, which way does that spring go?????
Or, do only one side at a time so you always have a good example to follow.
From there I removed all the hardware holding the shoes on and cleaned each part.
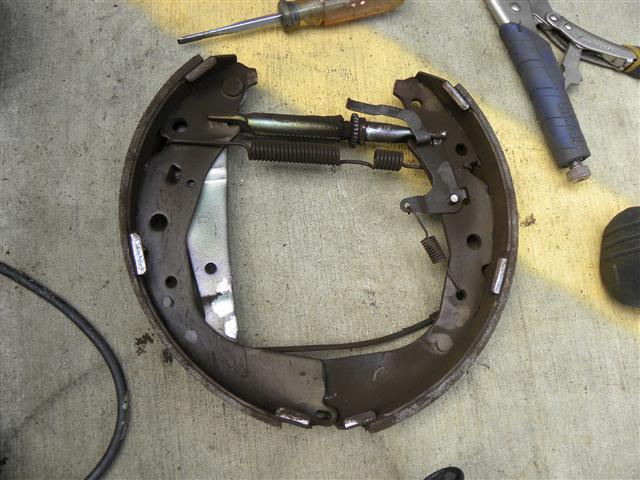
Once every part was cleaned I applied a very small amount of Permatex Ultra Disc Brake Caliper Lube to all the parts that make contact with one another excluding the drum and shoe faces.
If you get any of this lube on the shoe or drum faces your brakes will not work.
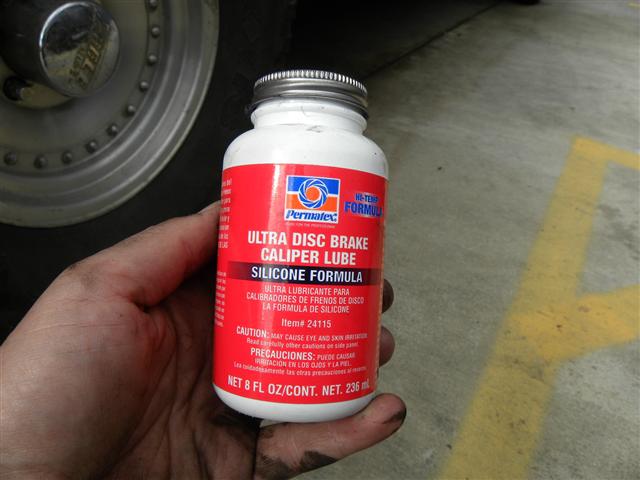
Once I assembled the new brakes I went back and wiped all the excess lube off.


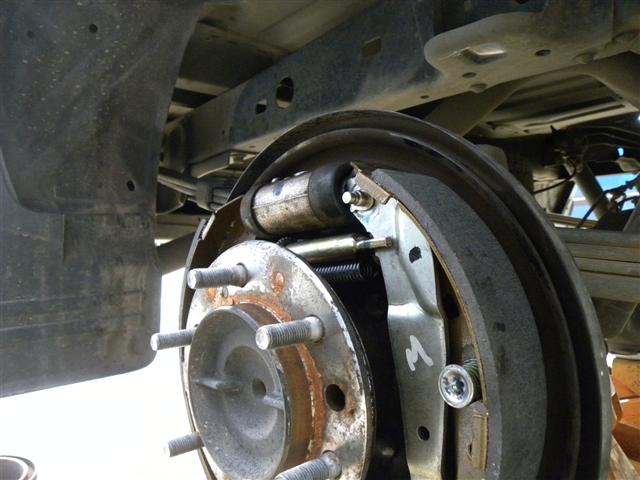
At this point I measured the OD of the brake shoes and the ID of the drums and adjusted the pads so that they would fit snugly in the drums.
Then I put the drums on and adjusted the adjustment wheel from the back side of the brake plate so that they were snug.
Once this was done to both sides I put the tires back on, torqued the wheels on and took it for a ride.
After using the E-Brake a few times I pulled back in and re-adjusted the brakes a bit more.
I then took it for one last test ride...... Perfect.
I hope this helps you save some time with your project.
If you have any comments or helpful suggestions, shoot me an email.
Thanks!
This page last modified: [an error occurred while processing the directive]