Page 3 of 4
Re: Lukas 1990 Kawasaki KX500 rebuild in Italy
Posted: Mon Aug 25, 2014 2:17 pm
by Sandblaster
It is looking better then new... I like it.
I should have had my frame powder coated before I put my supermoto together...
Oh well....
Re: Lukas 1990 Kawasaki KX500 rebuild in Italy
Posted: Mon Sep 01, 2014 5:32 pm
by Sandblaster
Quoted from Lukas:
"Just sand blasted
New connecting rod
New bearings
New seals
One of these days the engine will be closed
FINALLY
I've solved the problems with link
The bracketa was wrong!
Now without space!"

- 1.jpg (122.75 KiB) Viewed 10615 times

- 2.jpg (102.89 KiB) Viewed 10615 times

- 3.jpg (106.85 KiB) Viewed 10615 times
Re: Lukas 1990 Kawasaki KX500 rebuild in Italy
Posted: Mon Sep 01, 2014 5:38 pm
by Sandblaster
Looking good!
I knew you would figure out the bracket situation

Just a word of caution, If I sandblasted the inside of the cases I would take a Dremel tool with a wire wheel and go over all the internal surfaces.


You could use Scothbrite or SodaBlast them.
The ideal method is to Vapor Blast them, but more on that later.
This is what I found after I sandblasted my cases.

Don't want that gritty stuff in your engine cases...

Re: Lukas 1990 Kawasaki KX500 rebuild in Italy
Posted: Thu Sep 04, 2014 6:30 pm
by Sandblaster
Freshly plated cylinder
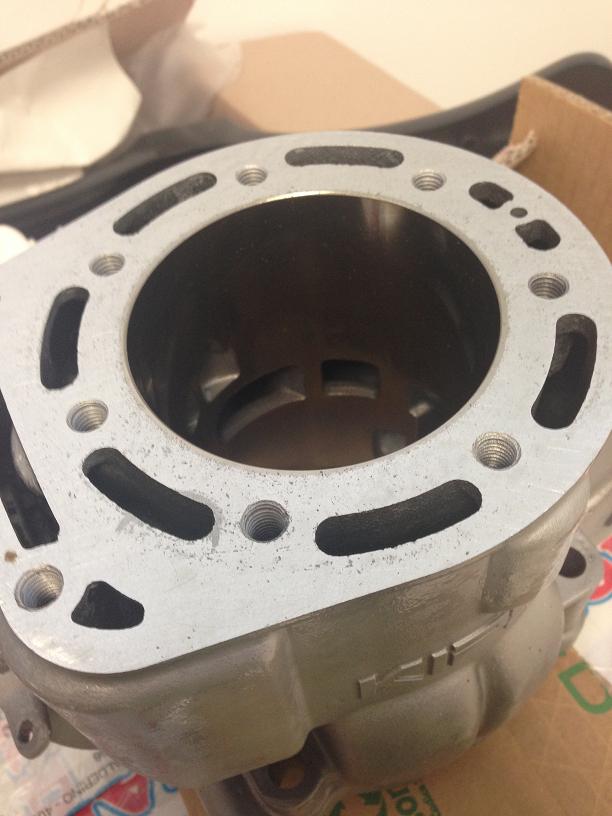
- 1990 kx500 lukas italy build 1.JPG (60.36 KiB) Viewed 10610 times

- 1990 kx500 lukas italy build 2.JPG (76.11 KiB) Viewed 10610 times
Nice clean up on the transfers and the floor ports
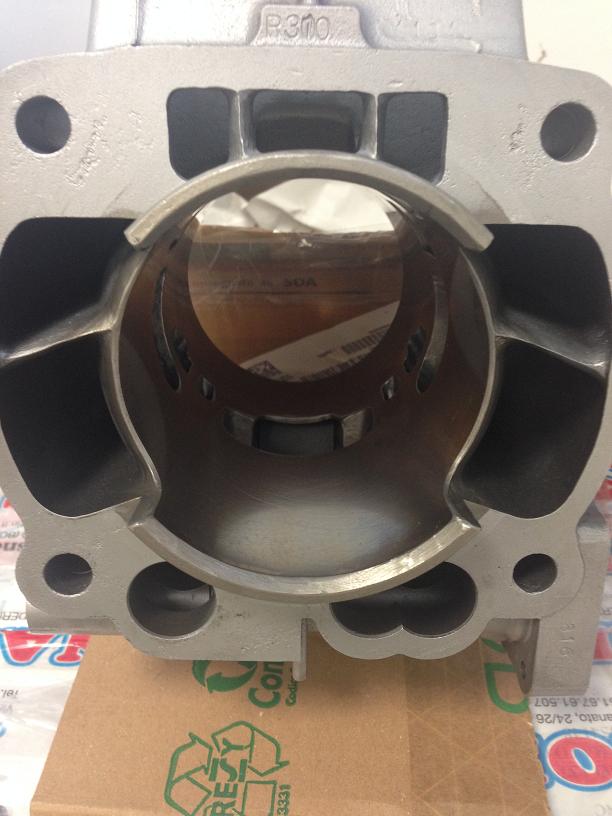
- 1990 kx500 lukas italy build 3.JPG (62.14 KiB) Viewed 10610 times
Take a look at the boost ports and floor ports.
Also note the rough surface of the intake area... Nice...

- 1990 kx500 lukas italy build 4.JPG (73.25 KiB) Viewed 10610 times
New plating is always so nice...

- 1990 kx500 lukas italy build 5.JPG (59.9 KiB) Viewed 10610 times
Re: Lukas 1990 Kawasaki KX500 rebuild in Italy
Posted: Tue Sep 09, 2014 8:48 am
by italianman
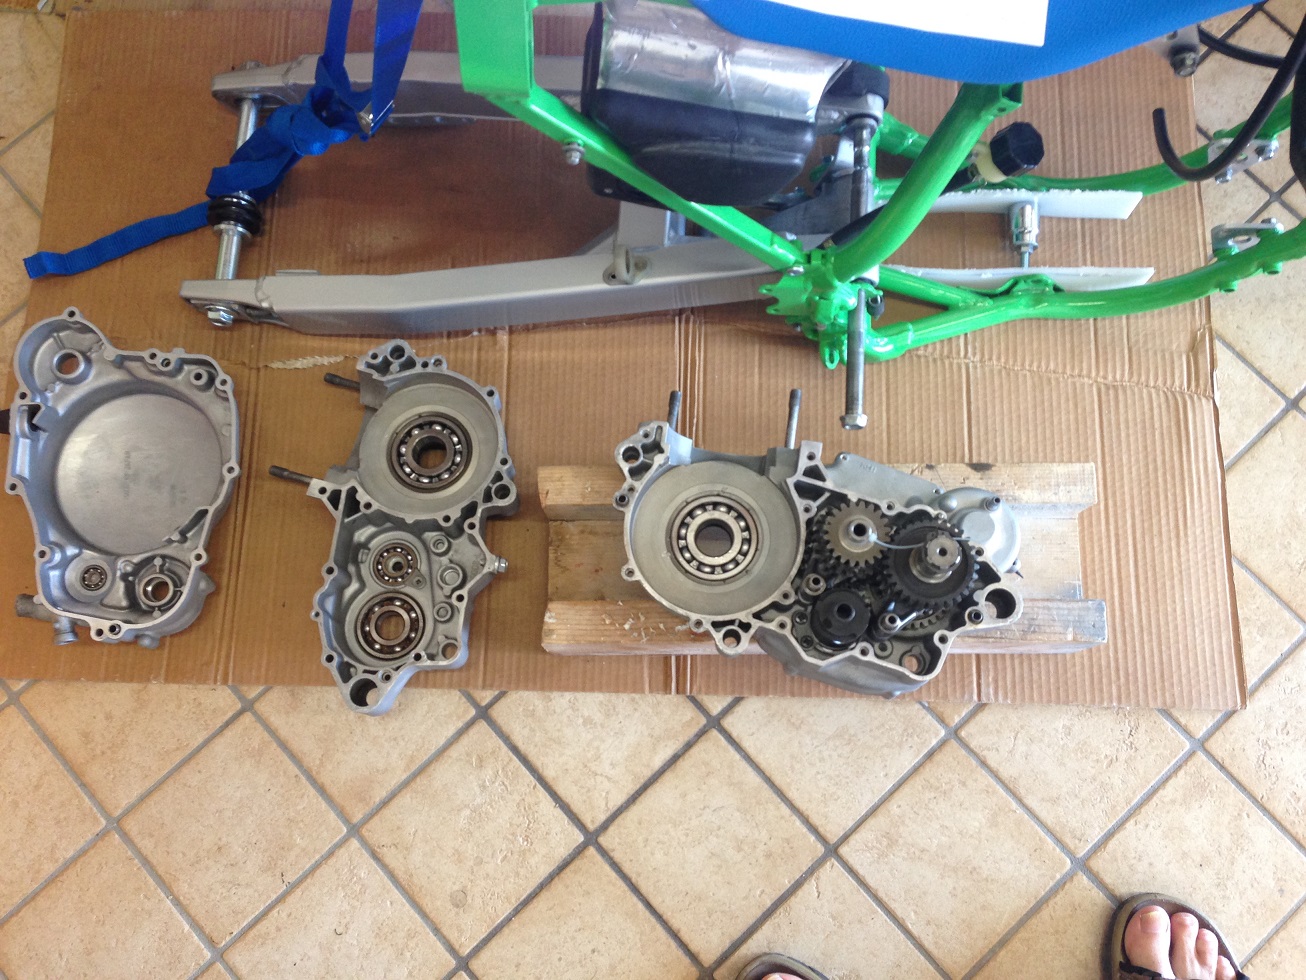
last weekend I started the reassembly of the bike.
With a lot of patience and calm and a cold beer of course!
put the cylinder head bolts just do not lose them

- IMG_3421.JPG (419.18 KiB) Viewed 10601 times
a few hours in the refrigerator and also the bearings are installed!
- IMG_3420.JPG (469.9 KiB) Viewed 10601 times

- IMG_3422.JPG (360.99 KiB) Viewed 10601 times

- IMG_3423.JPG (351.32 KiB) Viewed 10601 times

- IMG_3424.JPG (348.72 KiB) Viewed 10601 times
Re: Lukas 1990 Kawasaki KX500 rebuild in Italy
Posted: Tue Sep 09, 2014 8:55 am
by italianman
at work I noticed that the radiator has left the lower attachment wrong! E 'straight instead of at 90 ° !!
So on Saturday I'll have to use welder to the change.
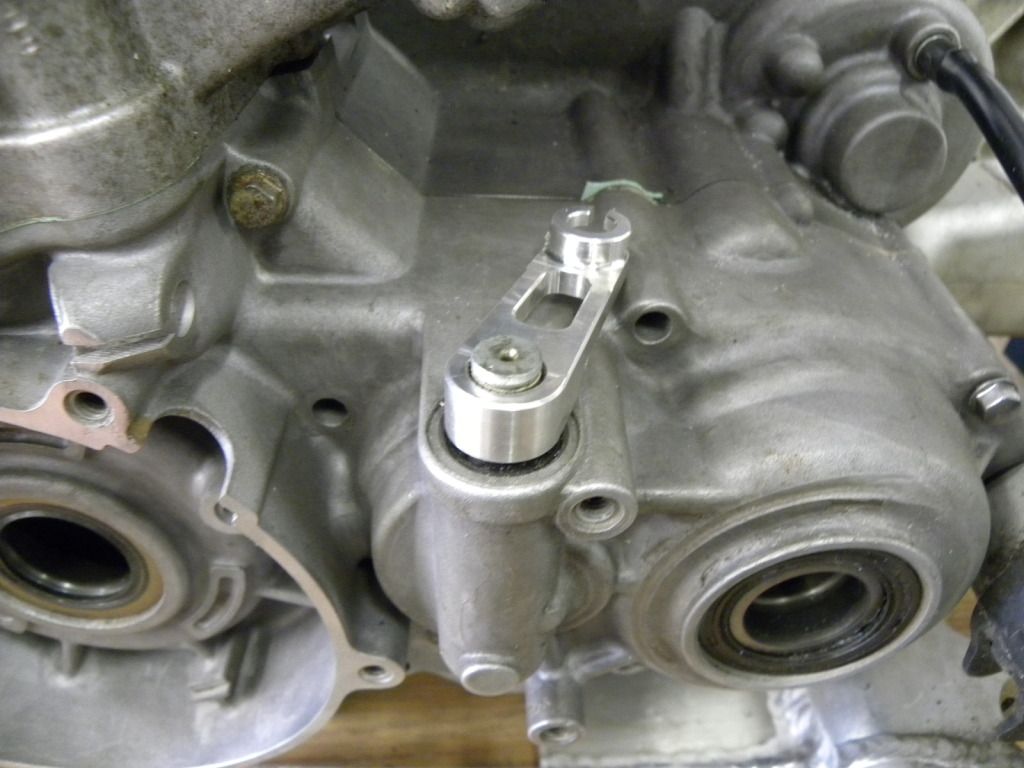
also the gear selector is wrong, this is for models after 1993 (larger diameter) and it is wrong on the clutch housing. Maybe it's a CR125
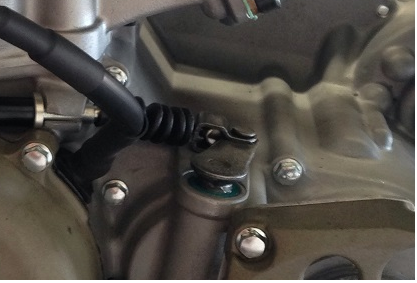
- clutch.png (167.29 KiB) Viewed 10601 times
Re: Lukas 1990 Kawasaki KX500 rebuild in Italy
Posted: Tue Sep 09, 2014 2:22 pm
by Sandblaster
Looks great!
If you want to use a after market shift shaft, You can replace the shift shaft with the newer larger shift shaft and you can use a shift lever from a KX450F.
You can also make your own clutch actuator arm with a longer lever so your clutch pull is easier like this..
As always your work is excellent.
Thanks for sharing.
Re: Lukas 1990 Kawasaki KX500 rebuild in Italy
Posted: Tue Sep 30, 2014 6:07 pm
by Sandblaster
Nice swing arm build.

- 90 kx500 swing arm rebuild.JPG (49.9 KiB) Viewed 10536 times
Re: Lukas 1990 Kawasaki KX500 rebuild in Italy
Posted: Wed Oct 15, 2014 2:33 pm
by Sandblaster
Here is the latest pic updates from Lukas

- IMG_3924.JPG (135.54 KiB) Viewed 10502 times
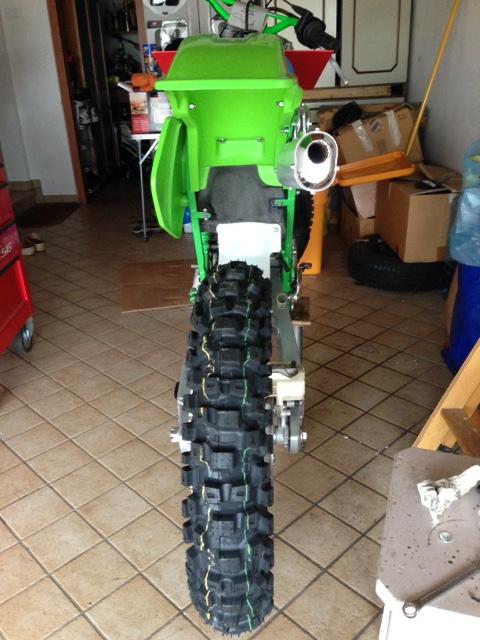
- IMG_3925.JPG (53.29 KiB) Viewed 10502 times

- IMG_3935.JPG (51.75 KiB) Viewed 10502 times
Very clean and neat work...
It makes me want to take my bike apart and start over.... Except for my engine
Re: Lukas 1990 Kawasaki KX500 rebuild in Italy
Posted: Sun Oct 26, 2014 4:05 pm
by Sandblaster

- 922375_360187384101709_1981369704_o.jpg (400.36 KiB) Viewed 10467 times