Page 3 of 4
Re: 1999 KX500 KAWASAKI ENGINE BUILD FOR KEVIN
Posted: Mon Feb 29, 2016 3:46 pm
by Sandblaster
Fresh out of the oven..
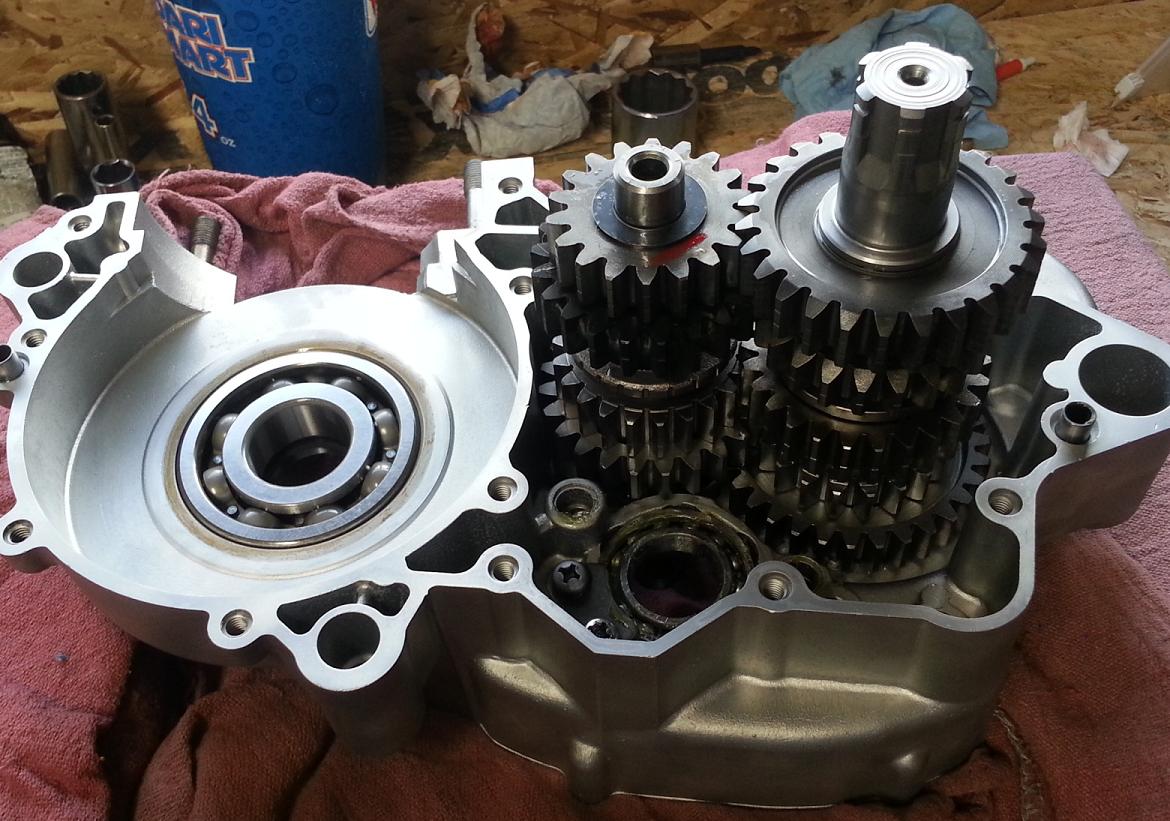
- OEM-CYCLE.COM 1999 KX500 KAWASAKI BUILD FOR KEVIN 162.JPG (152.3 KiB) Viewed 8962 times
Fresh from the freezer.
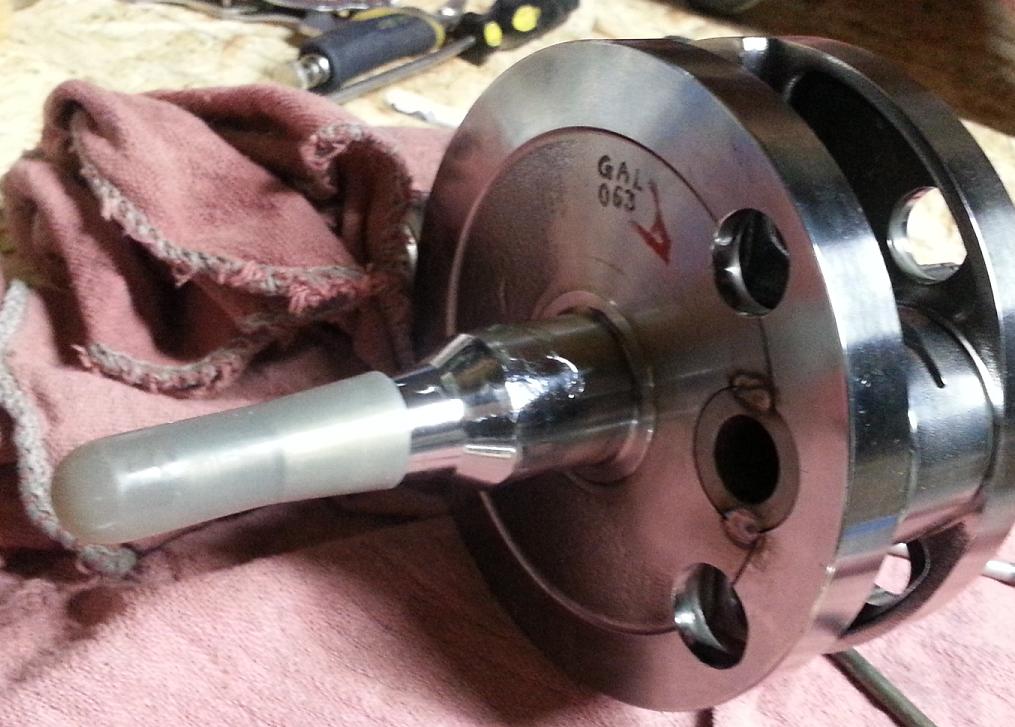
- OEM-CYCLE.COM 1999 KX500 KAWASAKI BUILD FOR KEVIN 163.JPG (98.95 KiB) Viewed 8962 times
Re: 1999 KX500 KAWASAKI ENGINE BUILD FOR KEVIN
Posted: Mon Feb 29, 2016 3:55 pm
by Sandblaster
So your all ready for the big moment.... And what's gonna happen?
Watch the master at work
 https://youtu.be/0JEPlaw_ZU8
Ok, so the crank is in and that's the easy part... Watch the master install the other case half..
https://youtu.be/Wp9g4RDLnow
Easy peasy

Re: 1999 KX500 KAWASAKI ENGINE BUILD FOR KEVIN
Posted: Mon Feb 29, 2016 3:58 pm
by Sandblaster
Now it's time to install and torque the case bolts.
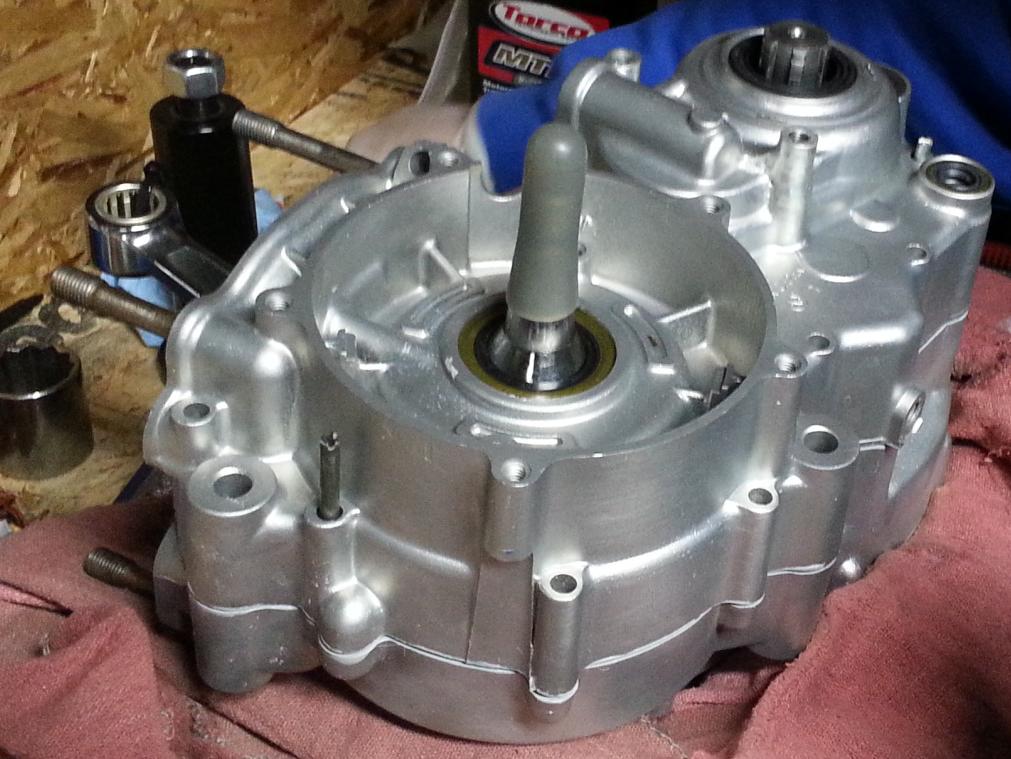
- OEM-CYCLE.COM 1999 KX500 KAWASAKI BUILD FOR KEVIN 164.JPG (109.45 KiB) Viewed 8962 times
Re: 1999 KX500 KAWASAKI ENGINE BUILD FOR KEVIN
Posted: Sat Mar 12, 2016 7:57 pm
by Sandblaster
Since we are waiting for the custom ported cylinder to get back from Milennium Tech Jason went ahead and rebuilt the clutch basket with a new basket

It turned out sweet...
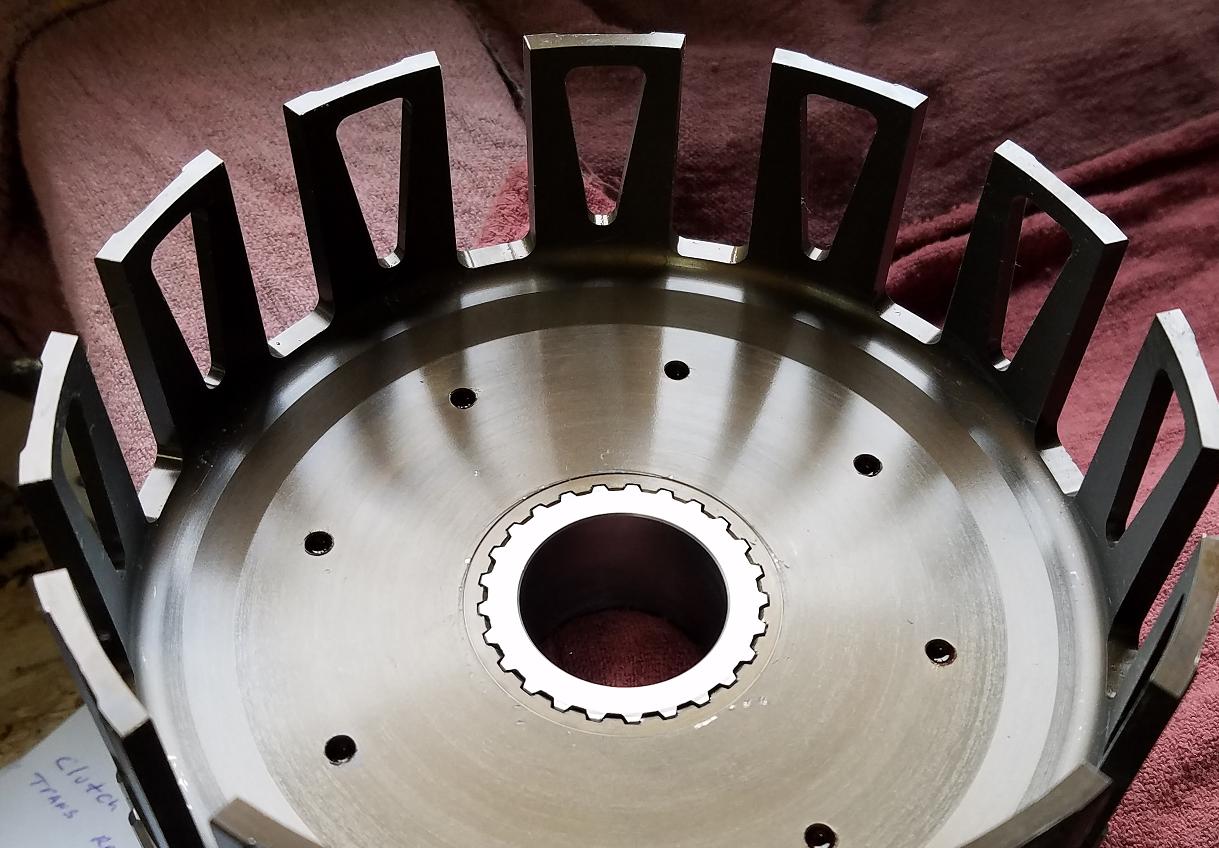
- OEM-CYCLE.COM 1999 KX500 KAWASAKI BUILD FOR KEVIN 170.JPG (132 KiB) Viewed 8911 times
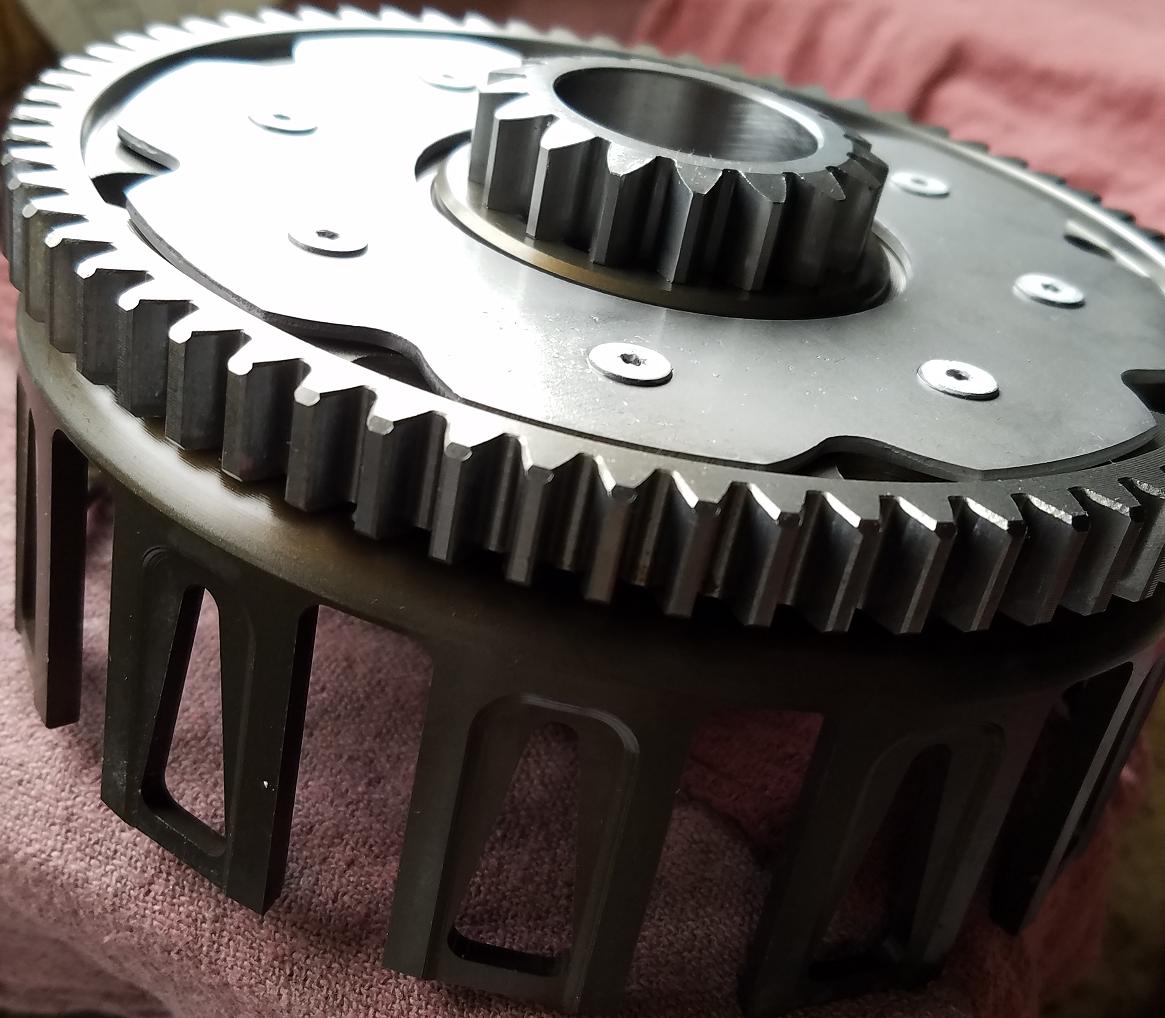
- OEM-CYCLE.COM 1999 KX500 KAWASAKI BUILD FOR KEVIN 171.JPG (122.51 KiB) Viewed 8911 times
Not shown in the pics, all the bolts were dimpled to help hold them together...
Re: 1999 KX500 KAWASAKI ENGINE BUILD FOR KEVIN
Posted: Fri Mar 18, 2016 11:31 pm
by Sandblaster
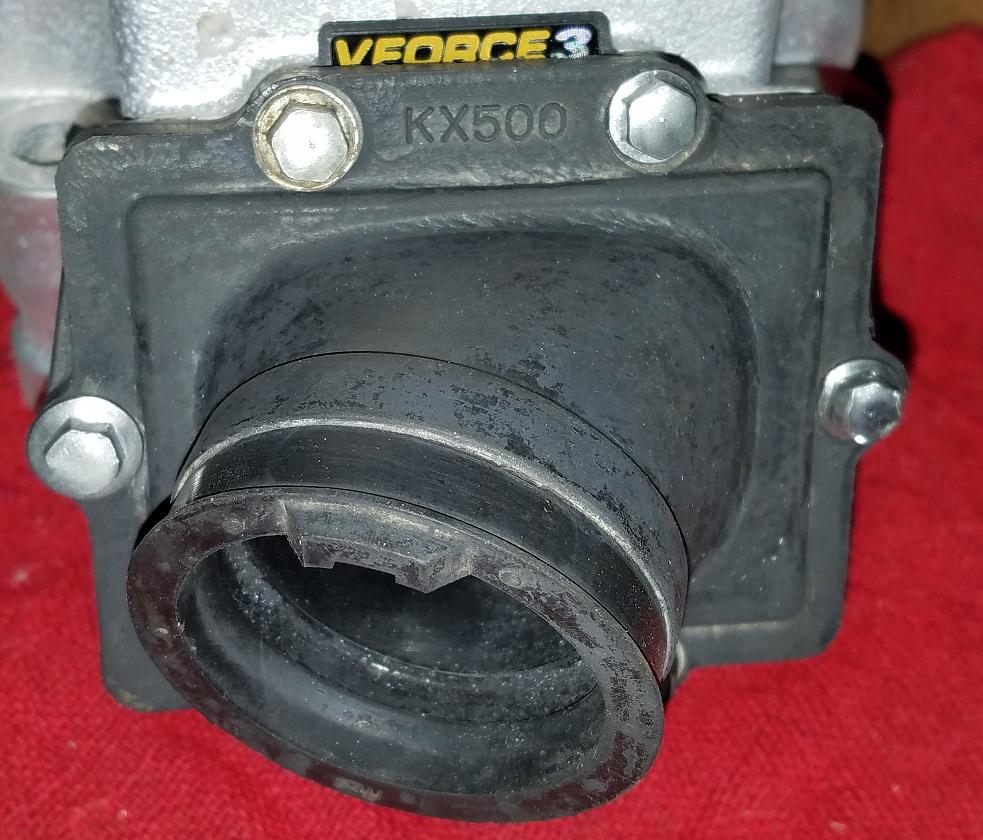
We managed to find a Vforce 2 red for this build so.... We need to modify the carb boot.
Stock..
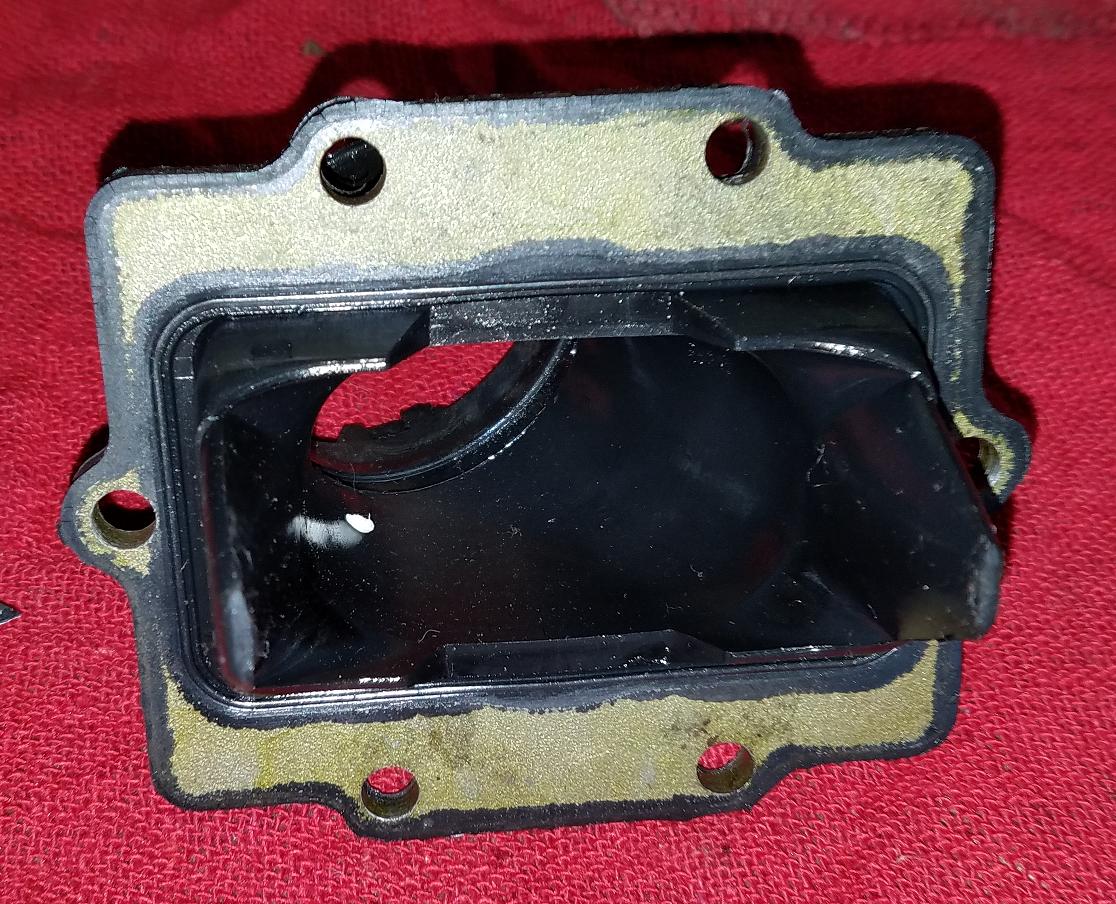
- JT ENGINE WORKS KX500 VF2 MODS 101.JPG (217.6 KiB) Viewed 8889 times
Ears are removed and sanded flat..
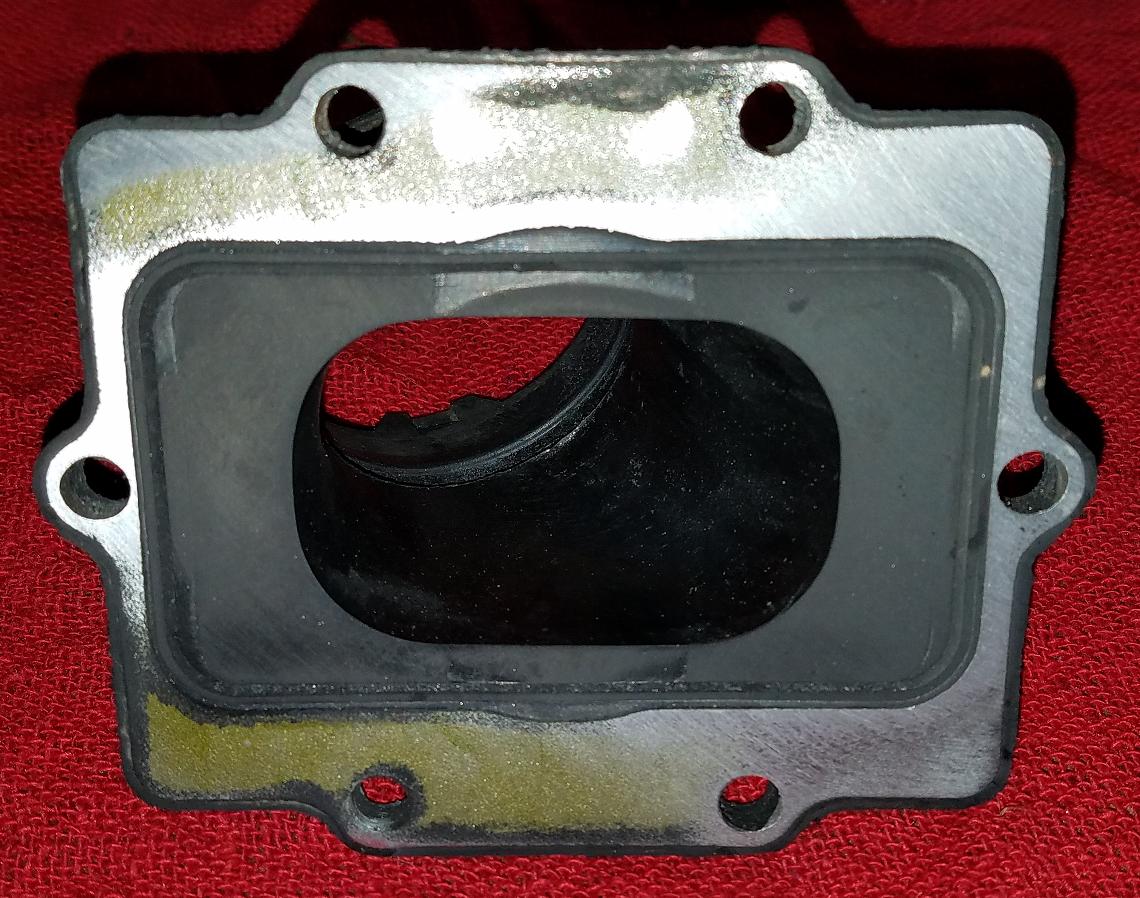
- JT ENGINE WORKS KX500 VF2 MODS 102.JPG (171.56 KiB) Viewed 8889 times
Now whip out the VForce 3 reed and stuffer..... What???

- JT ENGINE WORKS KX500 VF2 MODS 103.JPG (266.53 KiB) Viewed 8889 times
Yes... Put the VF3 in there with the stuffer..
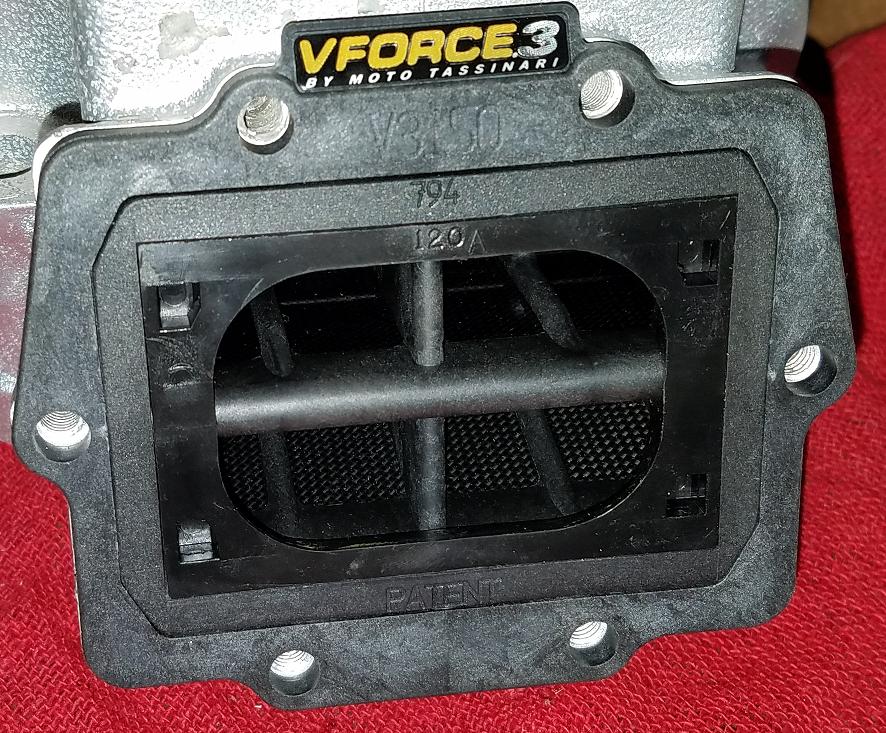
- JT ENGINE WORKS KX500 VF2 MODS 104.JPG (177.03 KiB) Viewed 8889 times
Re: 1999 KX500 KAWASAKI ENGINE BUILD FOR KEVIN
Posted: Fri Mar 18, 2016 11:34 pm
by Sandblaster
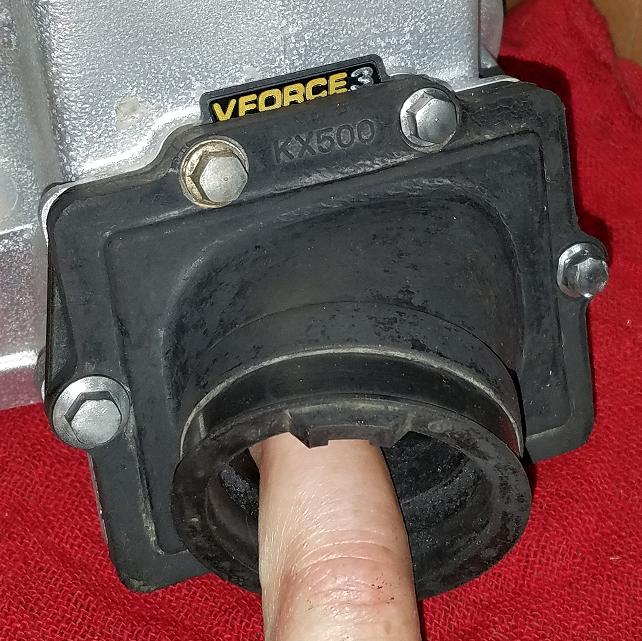
Now put some silicone of some type on the stuffer only...

- JT ENGINE WORKS KX500 VF2 MODS 106.JPG (124.18 KiB) Viewed 8889 times
Now install the boot...
- JT ENGINE WORKS KX500 VF2 MODS 107.JPG (115.81 KiB) Viewed 8889 times
Let it dry over night
- JT ENGINE WORKS KX500 VF2 MODS 108.JPG (89.96 KiB) Viewed 8889 times
Reach in there and feel around with your finger... You will understand why I do this mod..
Re: 1999 KX500 KAWASAKI ENGINE BUILD FOR KEVIN
Posted: Sat Mar 19, 2016 11:46 pm
by Sandblaster
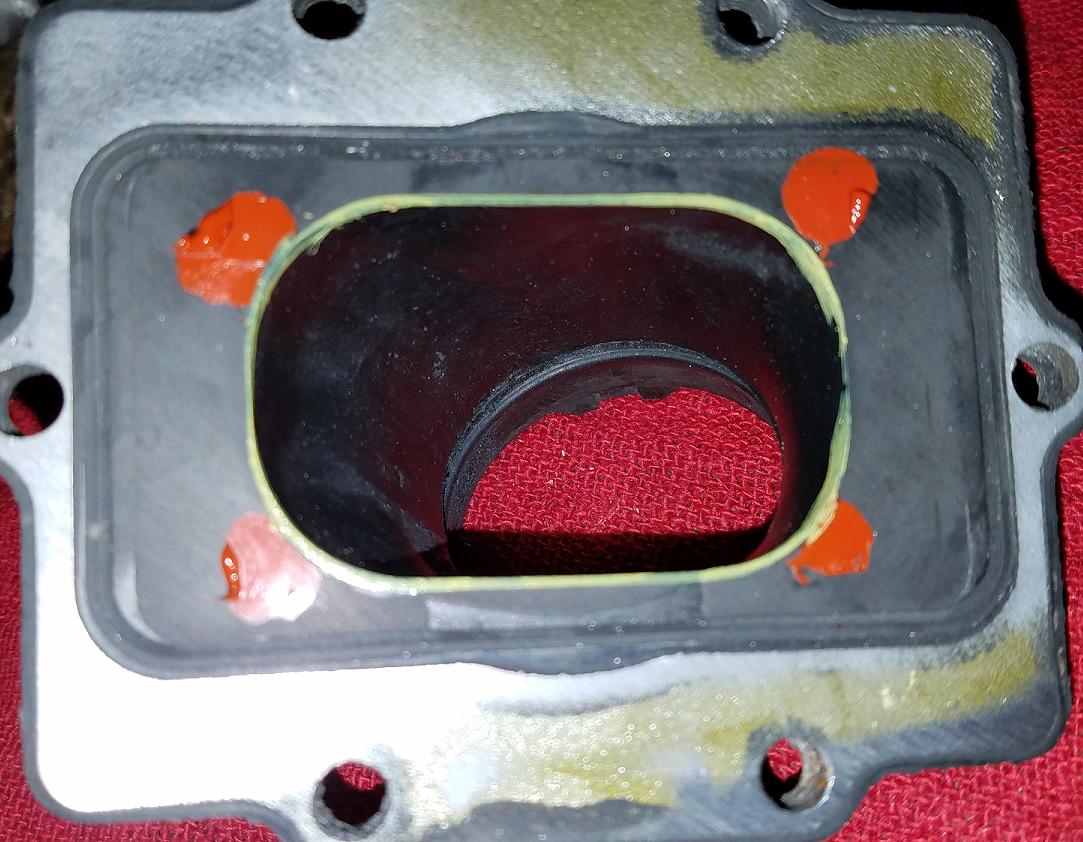
After the goop has set up, carefully remove the boot and take a look at what you have..
Note the difference in the boot hole VS the stuffer hole..
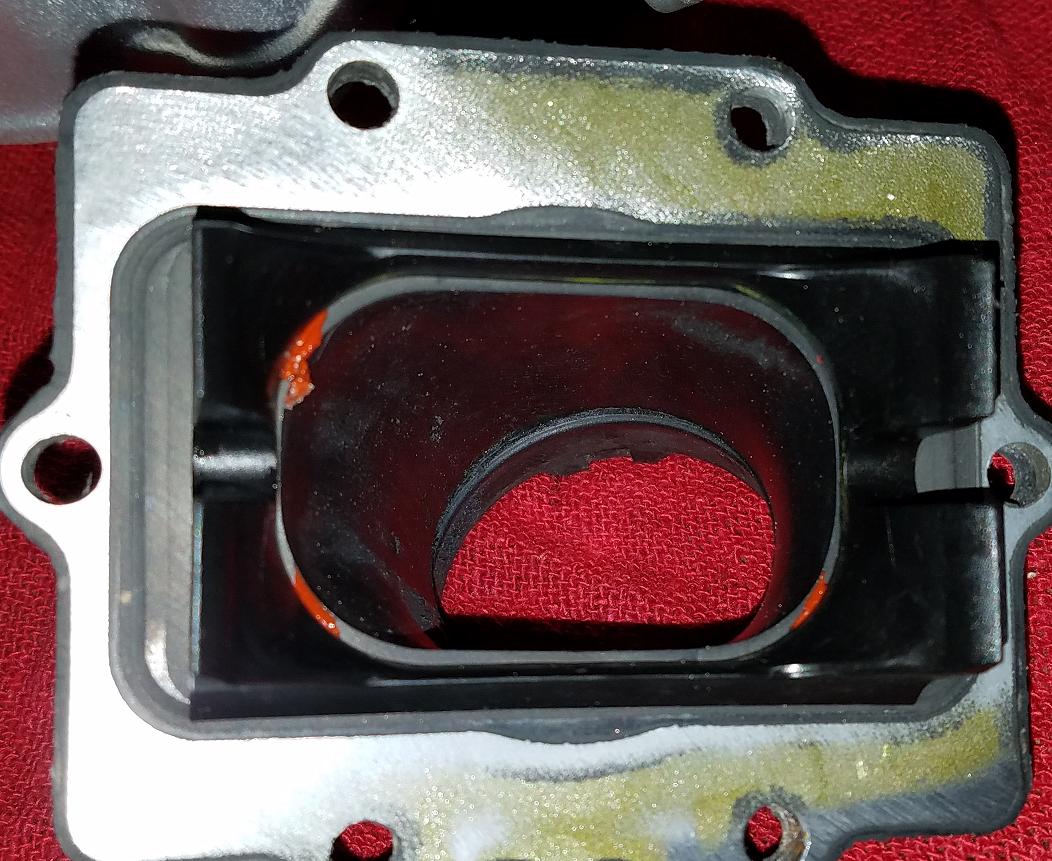
- JT ENGINE WORKS KX500 VF2 MODS 110.JPG (149.48 KiB) Viewed 8883 times
Clean away the excess goo without breaking the stuffer from the boot.. Then get a marker and mark the boot.
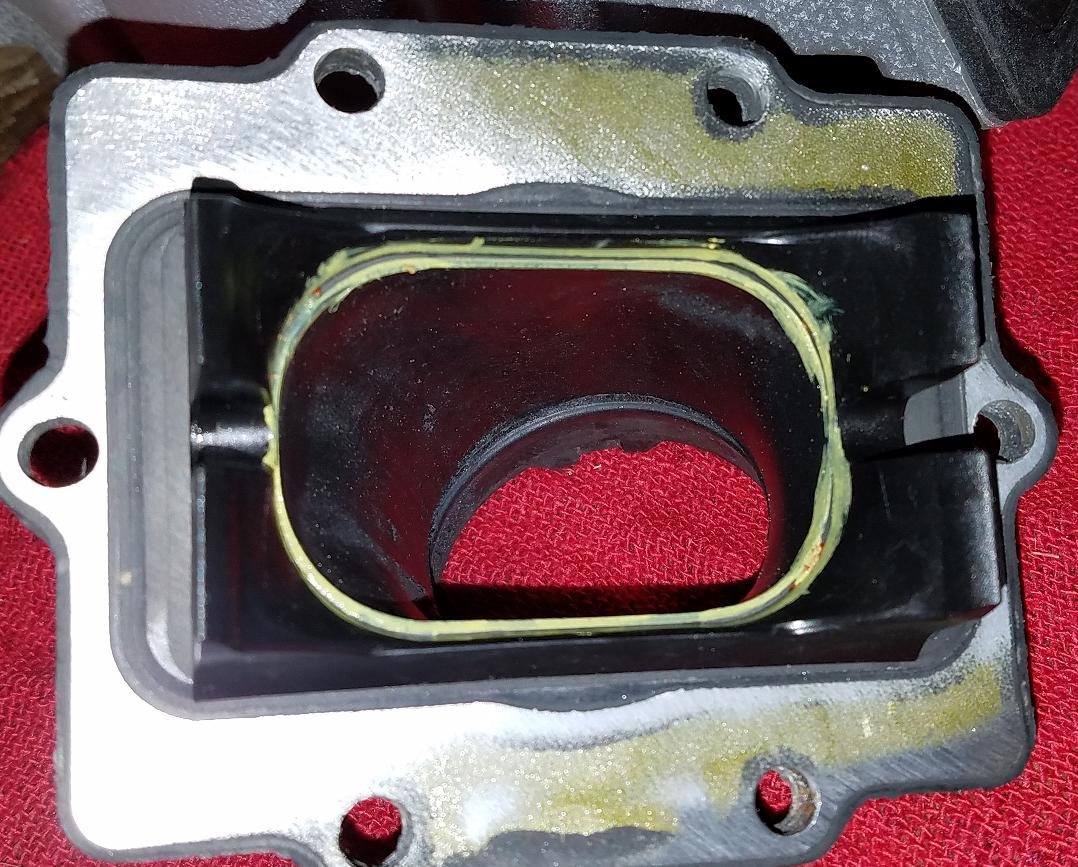
- JT ENGINE WORKS KX500 VF2 MODS 111.JPG (176.84 KiB) Viewed 8883 times
Now remove the stuffer from the boot and see what you have..
- JT ENGINE WORKS KX500 VF2 MODS 112.JPG (127.11 KiB) Viewed 8883 times
Re: 1999 KX500 KAWASAKI ENGINE BUILD FOR KEVIN
Posted: Sat Mar 19, 2016 11:49 pm
by Sandblaster
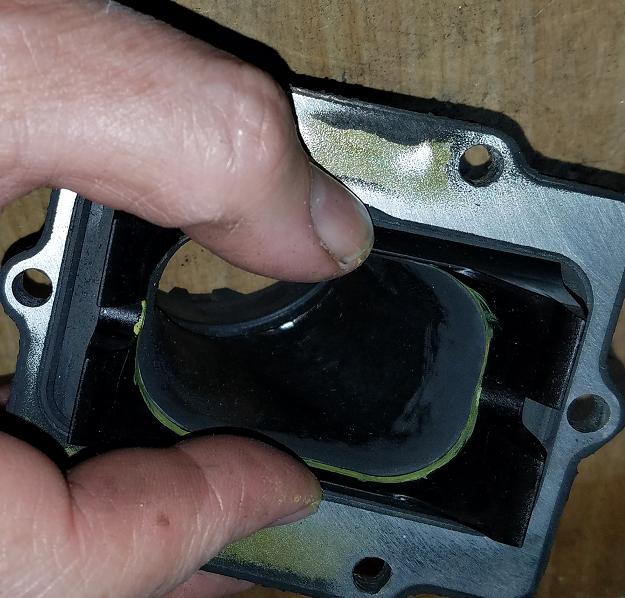
That yellow profile need to go away..
The first time I ever did one of these I used a small sanding drum on a Dremel.
My tools have improved somewhat since then...

- JT ENGINE WORKS KX500 VF2 MODS 113.JPG (130.63 KiB) Viewed 8883 times
It's still a little rough but you get the idea..
- JT ENGINE WORKS KX500 VF2 MODS 114.JPG (61.11 KiB) Viewed 8883 times
Now you can compare the VF3 stuffer and make sure that you didn't miss anything...
NEXT!!!!
Re: 1999 KX500 KAWASAKI ENGINE BUILD FOR KEVIN
Posted: Wed Apr 13, 2016 7:29 pm
by Sandblaster
For those that know, enough said
Re: 1999 KX500 KAWASAKI ENGINE BUILD FOR KEVIN
Posted: Tue Apr 19, 2016 11:02 pm
by Sandblaster
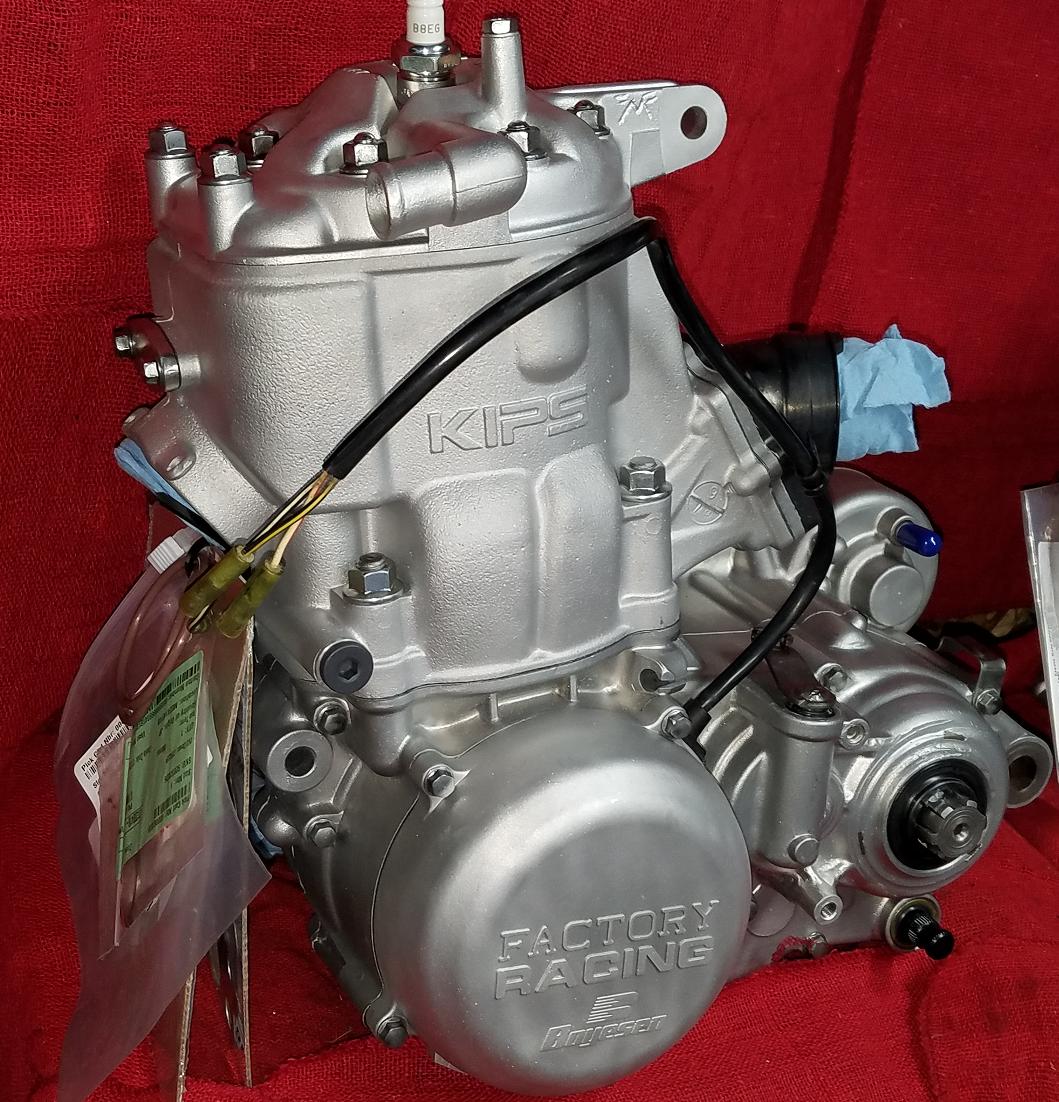
All Done!!!
- OEM-CYCLE.COM 1999 KX500 KAWASAKI BUILD FOR KEVIN 200.JPG (205.23 KiB) Viewed 8803 times
This engine will be a wild child with plenty of room for even more power

Shipped with no oil, although all the parts are fully lubed.
Do your heat cycles, then ride it easy.
By the end of your first tank start opening it up for brief periods.
By tank two let her rip.... Just don't hold it Wide Open for a mile straight until tank two is fully gone...
And by all means, check your plug color to be sure you aren't running lean...