Page 5 of 6
Re: BUILDING A KX500AF with a 2007 KX250F chassis
Posted: Sun May 05, 2013 1:04 am
by Sandblaster
Thanks to Motorrad I was further examining the fitment between the cylinder and the engine cases.

- other concerns.JPG (42.85 KiB) Viewed 15941 times
Looks like some improvement is required...
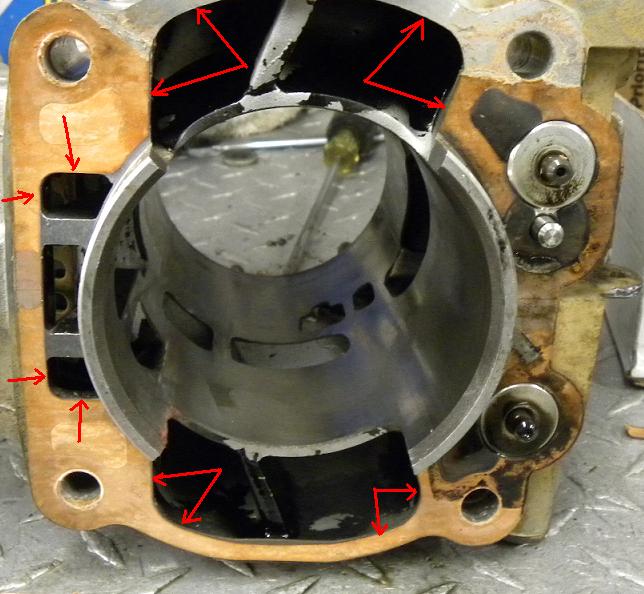
Then I checked out this cylinder that was removed from a bottom end on Friday.
Notice the gasket material hanging into the ports?
BAD!
Before my gasket goes on it will be matched.
- other concerns 2.JPG (62.86 KiB) Viewed 15941 times
Re: BUILDING A KX500AF with a 2007 KX250F chassis
Posted: Sun May 05, 2013 1:50 am
by Qsixteen
Rick Peterson dyno testing a base gasket that hang into the transfer .250" and it didn't change the dyno numbers. Just like a mismatch at exhaust outlet and header flange.
Re: BUILDING A KX500AF with a 2007 KX250F chassis
Posted: Sun May 05, 2013 1:59 am
by Sandblaster
Interesting.
I wouldn't do it on my build.
What do you do on yours?
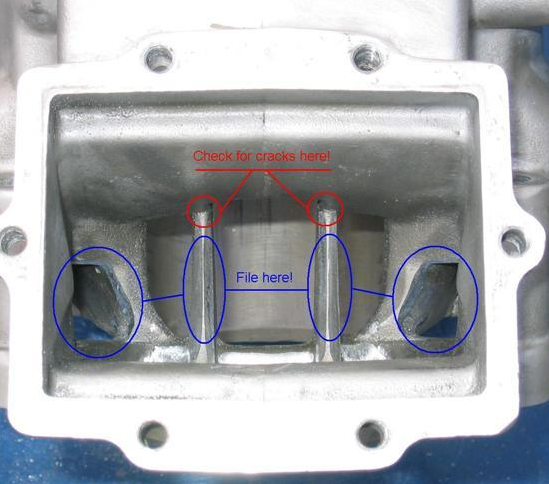
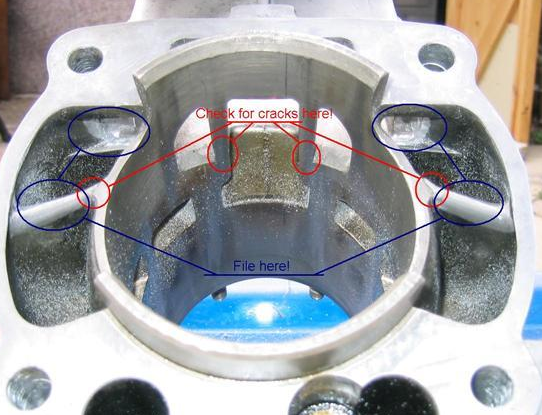
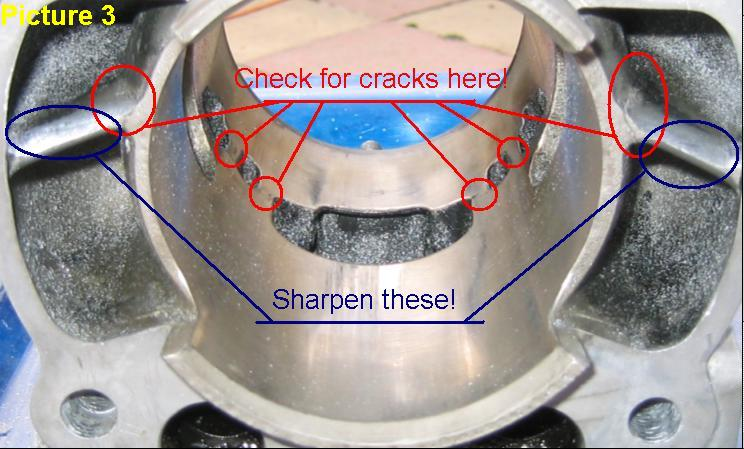
I really like this article:
http://www.hallbergs.net/kx500/
I have seen it referenced many times in the past few years but I finally sat down and read it.
Here's some pics of their port work.
- port 1.png (405.16 KiB) Viewed 15939 times
- port 2.png (362.96 KiB) Viewed 15939 times
- port 3.png (533.77 KiB) Viewed 15939 times
Re: BUILDING A KX500AF with a 2007 KX250F chassis
Posted: Sun May 05, 2013 2:11 am
by Qsixteen
It doesn't hurt to trim them up. On my devcon motor I have to make a base gasket.
Re: BUILDING A KX500AF with a 2007 KX250F chassis
Posted: Tue Oct 15, 2013 9:42 pm
by Sandblaster
Re: BUILDING A KX500AF with a 2007 KX250F chassis
Posted: Wed Nov 20, 2013 1:56 am
by Sandblaster
I finally spent some time on this project today.
I made another version of the two piece clutch cover to keep the cost as low as possible.
I think 5 profiles and all the holes can be machined in one set up, then the last step would have to be done one at a time unless a jig was made.
But for now, no jig..
I'm getting quotes on the material and the machining.
I hope to have some news fairly soon.
After a few of us verify the design viability then I will let every one know the cost.
Then, I will look at making custom covers and a slightly different design

Re: BUILDING A KX500AF with a 2007 KX250F chassis
Posted: Wed Nov 27, 2013 9:11 pm
by Sandblaster
Here is the next challenge..
The gas tank hits the head even without the petcock valve.
As shown earlier, I destroyed my last tank so I will be a bit more careful when molding this one

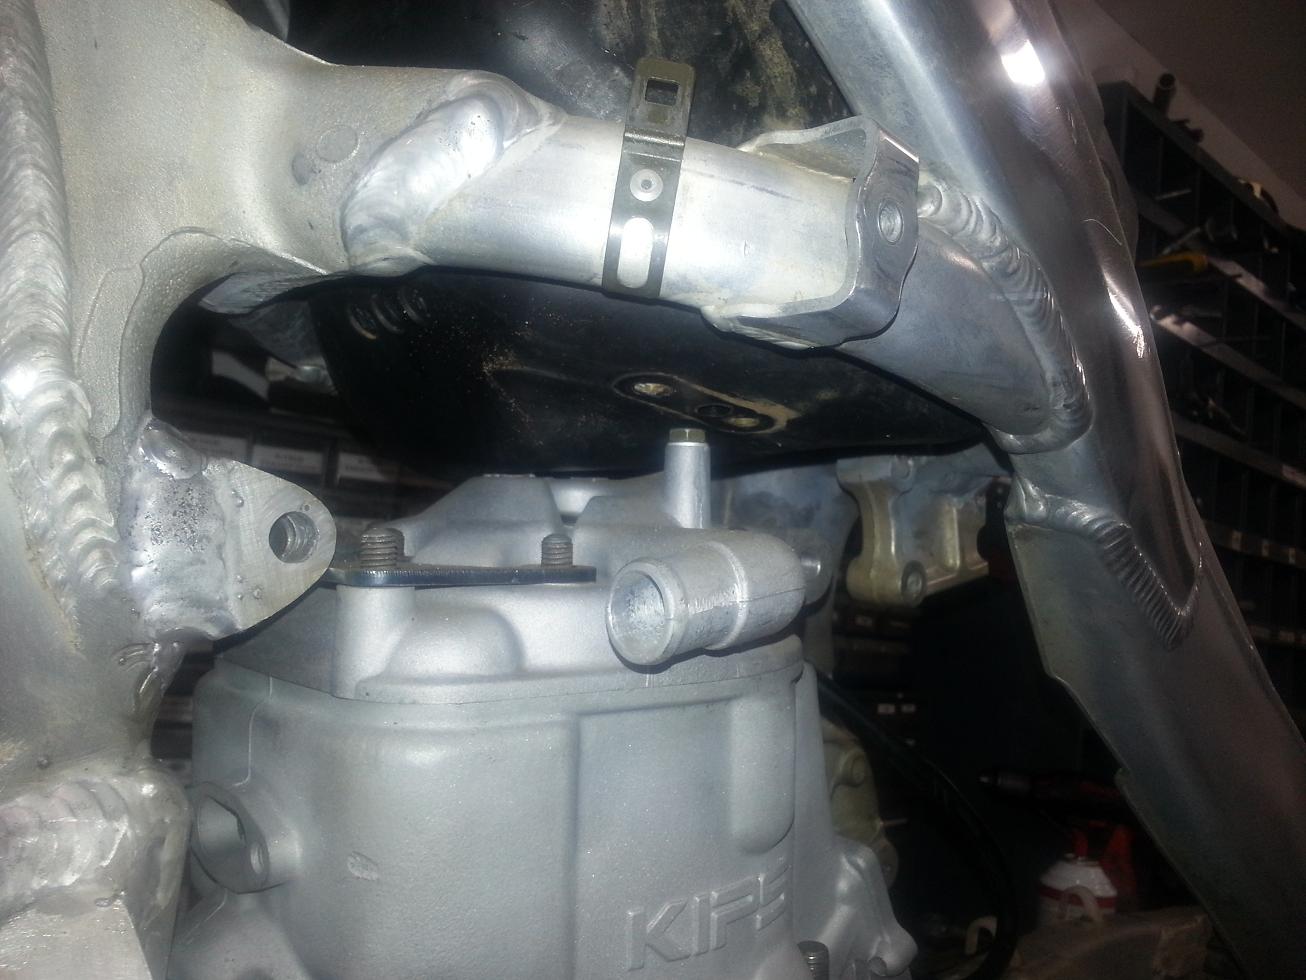
- GAS TANK INTERFERANCE.JPG (136.49 KiB) Viewed 15679 times
Using a Petcock valve and remote reservoir from a KLX450 will help the problem but it is not a cure all...
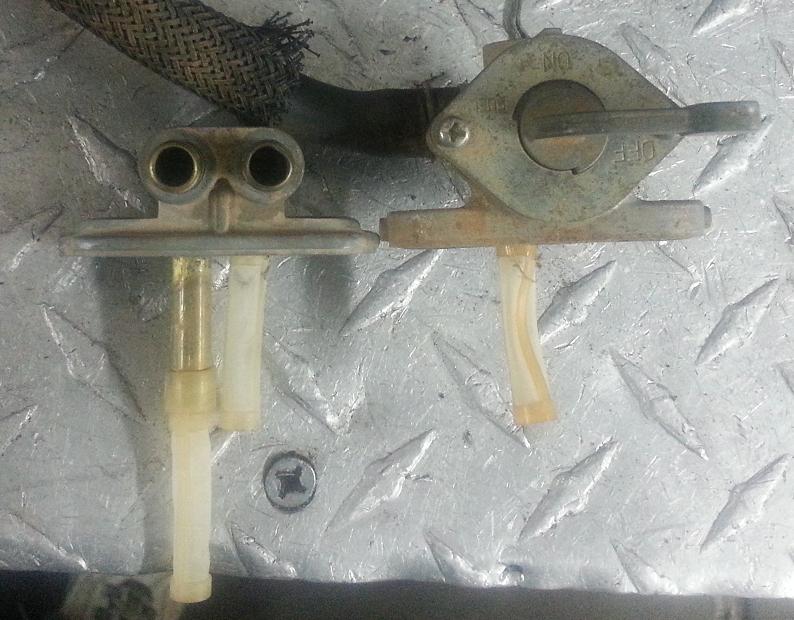
- pet cock comparison.JPG (78.08 KiB) Viewed 15679 times
Since I burned a hole in mine using a heat gun last time I am going try boiling my next one.
Re: BUILDING A KX500AF with a 2007 KX250F chassis
Posted: Mon Mar 30, 2015 12:28 am
by 500heaven
What pipe did you use for this bike i talk to service honda they dont know whats the best pipe for that built i saw that you use a fmf pipe what year and what model is it from?
Re: BUILDING A KX500AF with a 2007 KX250F chassis
Posted: Mon Mar 30, 2015 9:02 pm
by Sandblaster
I used the Service Kawasaki pipe.
It took a little phone work and convincing to get them to sell it to me.
They said the reason for them not wanting to sell it is because these are a custom fit.
So, you may need to make some new brackets and wiggle it around.
In truth, mine fit really nice and I had to make custom brackets anyway.
If they will not sell you one then you can get the use the head section from a KX500 pipe and weld it to the rear section of the CR500 pipe which is what Service Kawasaki does

Re: BUILDING A KX500AF with a 2007 KX250F chassis
Posted: Tue Mar 29, 2016 6:13 pm
by africanfish
Sandblaster wrote:I had considered a slightly different design but decided in favor of the design above:
mount.JPG
Is there some way I can get this diagram to print out and use to trace it on the metal to cut it with a plasma cutter and it be the n the correct size? This is for the front engin mount using the head bolts.